

Top PM Fiber Fusion Splicers: The Best Options for Precision Splicing
2026-10-08
Getting a low-loss splice on polarization-maintaining fiber is rarely about the fiber itself—it’s about how precisely the splicer sees and aligns the stress rods. The best PM fusion splicers handle that alignment without slowing down your workflow. In this roundup, we break down the top performers for extinction ratio, stability, and ease of use, including DVP models that have quietly built a reputation in high-mix production environments. If you’re tired of rework from axis mismatch, here’s what actually matters.
Why PM fiber punishes sloppy core alignment
PM fiber is not just a circular waveguide with a bit of extra glass. The core is sandwiched between stress rods that create a strong birefringence, and the whole point is to keep light locked onto one of the two orthogonal polarization axes. When you splice or connectorize PM fiber with even a slight rotational or lateral misalignment of the core, you are no longer launching light cleanly along that intended axis. A portion of the optical power immediately couples into the orthogonal mode, and the polarization extinction ratio falls off a cliff. The fiber still guides light, but it has stopped doing the one job you paid extra for.
What makes PM fiber especially punishing is that the damage is physical and cumulative. With standard single-mode fiber, a small core offset simply adds a little insertion loss that you can budget around. PM fiber, by contrast, converts that offset into cross-polarization noise, and the effect gets worse at every connector, splice, or mechanical joint downstream. A rotational error of just one degree can degrade extinction ratio by more than 20 dB, and no amount of electronic processing or polarization scrambling will bring it back cleanly. You can’t tune it out with a polarization controller because the defect is baked into the physical junction. So the link may pass a quick continuity check or an OTDR trace, yet fail outright when you measure crosstalk or coherent detection performance.
The extinction ratio detail most splicer reviews skip
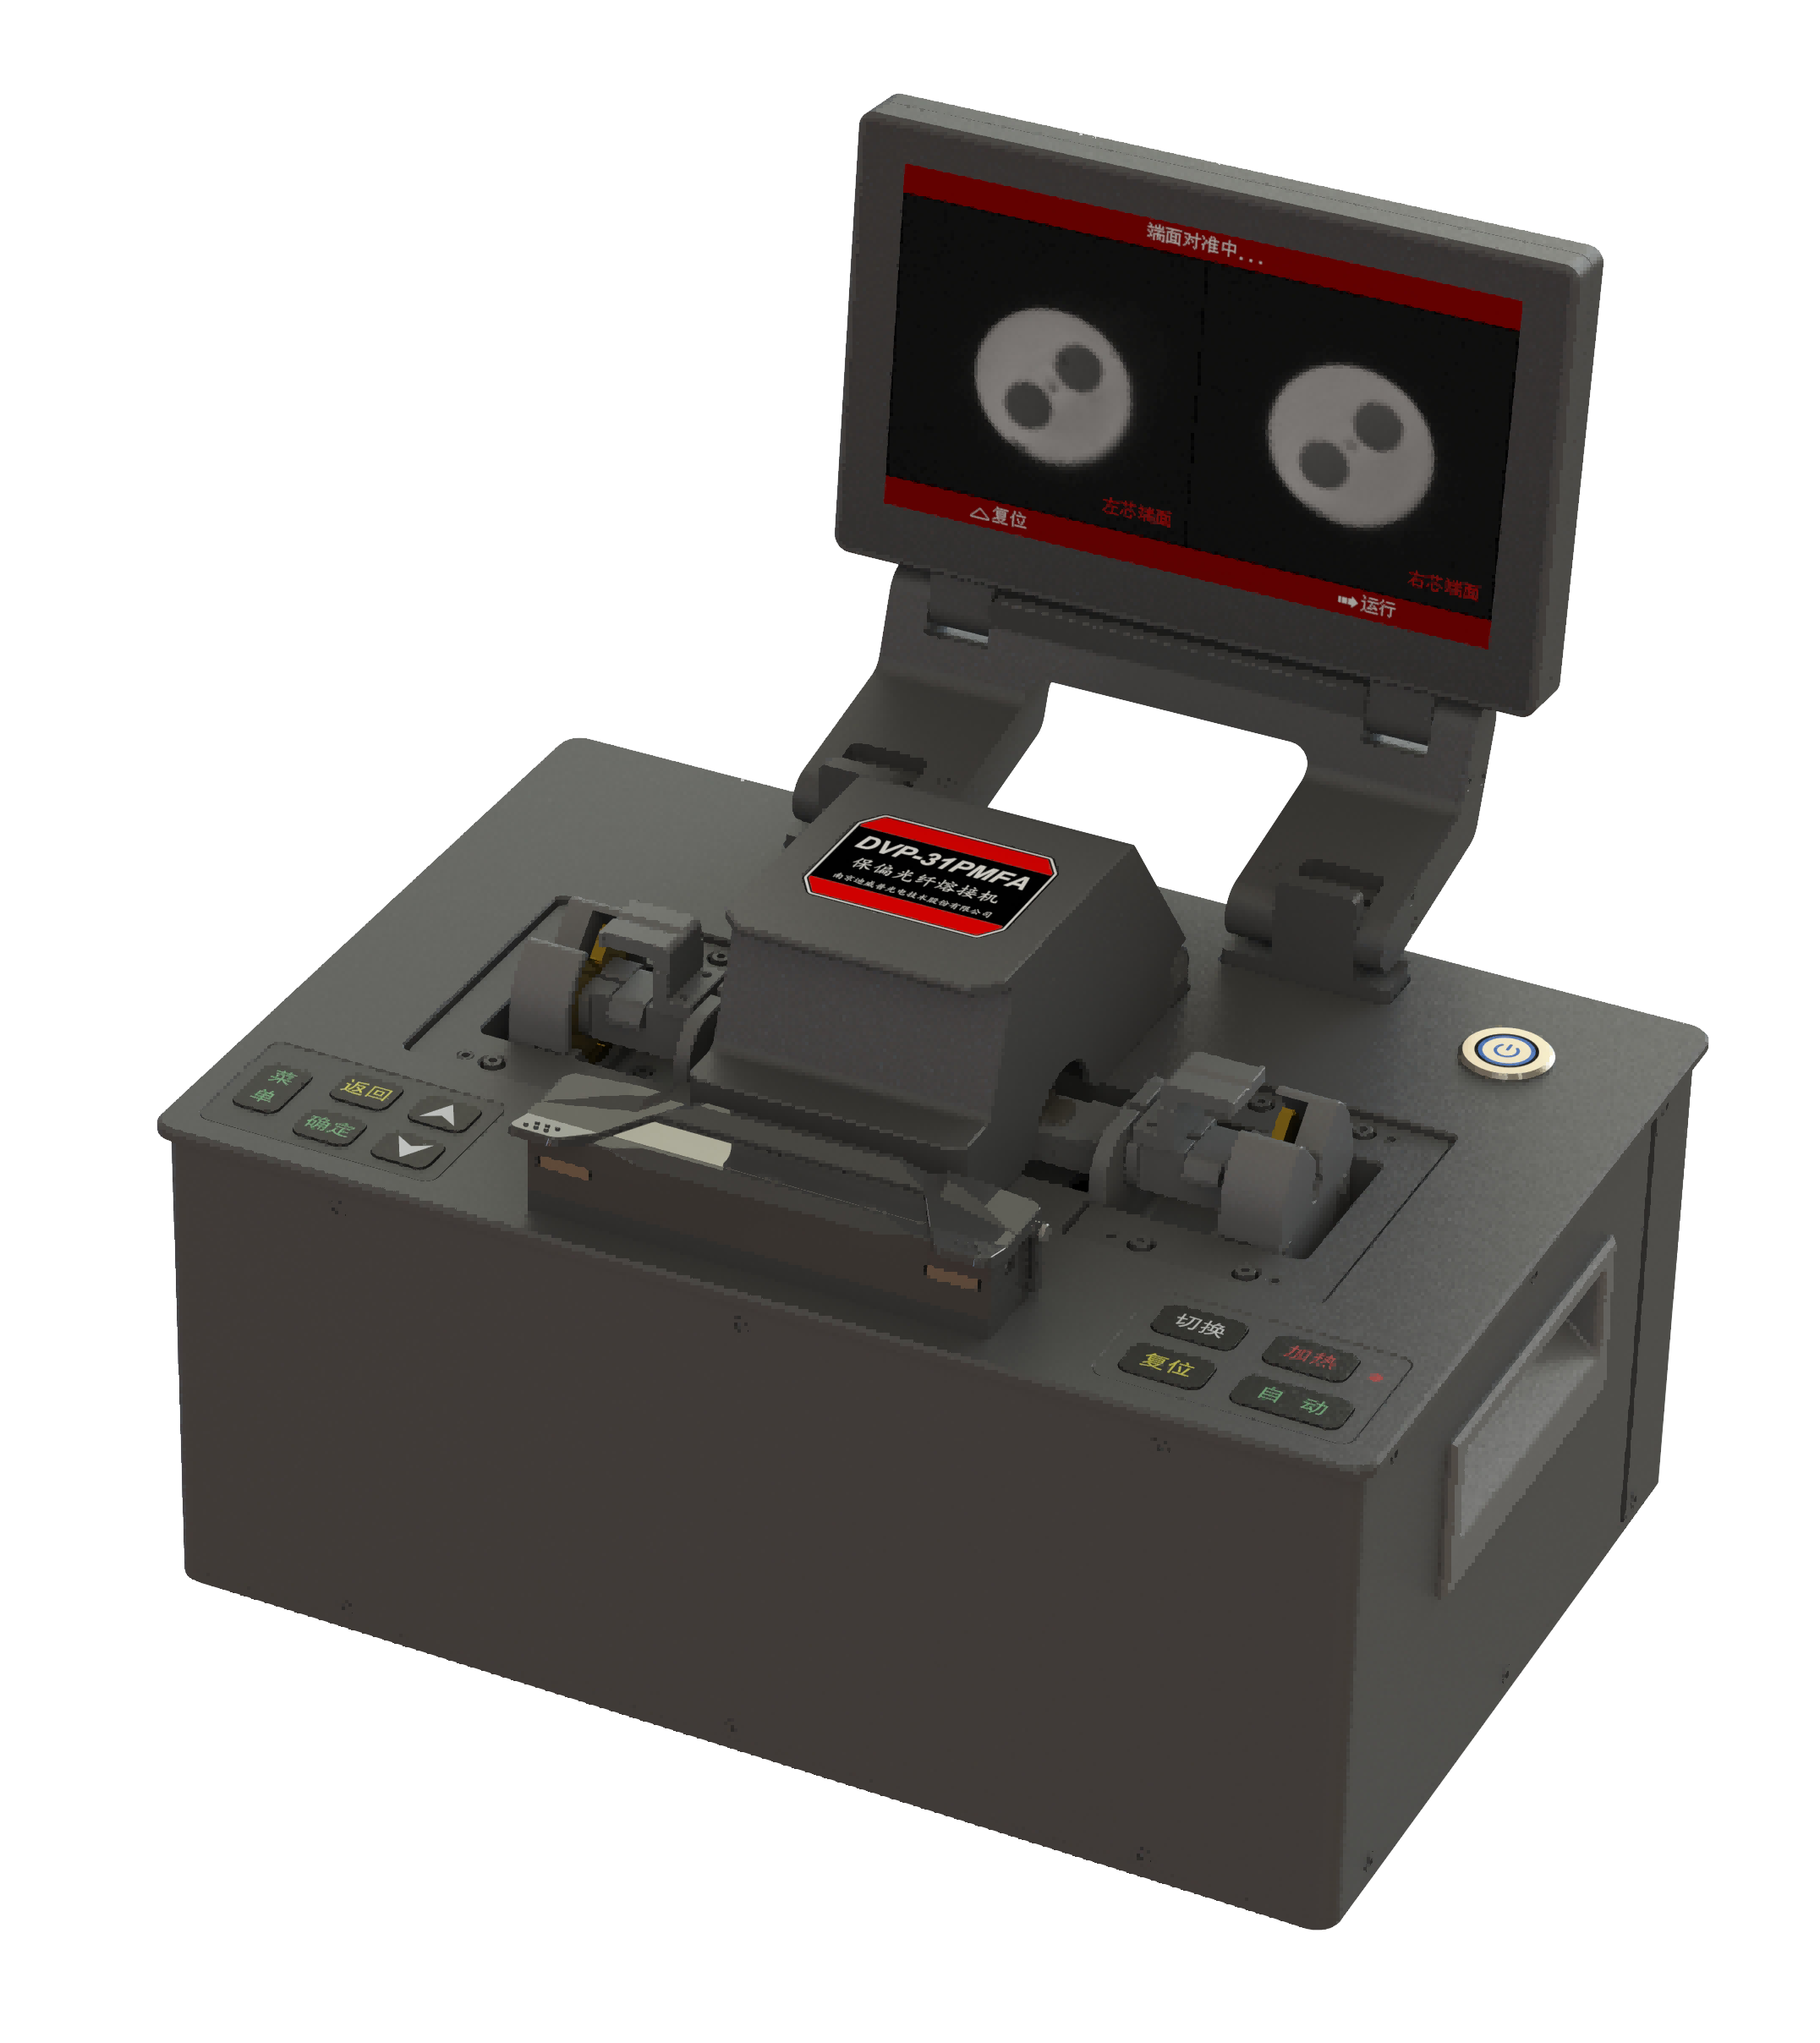
Most fusion splicer reviews obsess over splice loss and alignment accuracy—then quietly skip the extinction ratio number. That single figure tells you how cleanly the splicer maintains polarization alignment across the joint. If it slips from 30 dB to 22 dB after splicing, your polarization-maintaining fiber no longer suppresses the unwanted mode, and the “low loss” splice becomes a noise source in your interferometer or fiber gyro.
The reason this detail disappears from reviews is practical: measuring extinction ratio demands a stable polarized source and a careful reference, which takes more time than a quick loss check. But field technicians know a splicer that holds a high ratio under real-world conditions beats a spec sheet that only claims one. So next time a review tells you the splice loss is 0.02 dB, ignore the headline and ask what happened to the polarization—because that’s where marginal splicers start to fail.
What a bench splicer does that a portable unit can’t
A bench splicer isn’t just heavier—it anchors the entire splice cycle. Where a portable unit relies on field-friendly compromises, a bench model keeps fiber holders, electrodes, and heat shrink oven in fixed relation. That rigidity means repeatable loss readings across hundreds of splices without the drift you get from a handheld device after a few rough transports.
Ribbon fiber is the obvious dividing line. Most portable splicers max out at single fibers or maybe 2–4 with an adapter, while a bench unit can align and fuse 12 fibers at once in a single pass. Then there’s the oven: bench ovens have longer, more even heat profiles, so the splice protector shrinks without bubbles or weak spots. If you’re doing tray after tray in a splice trailer, that consistency is the difference between a clean OTDR trace and a callback.
Splice protection sleeves that won’t stress the fiber
Most splice sleeves do their job until temperature swings or tight routing enters the picture. Then the polymer shrinks a little more, the steel rod picks up a curve, and suddenly a perfectly good splice turns into a loss point. These sleeves are built around a softer inner layer that grips the bare fiber without pinching it, so the glass can sit in its natural position instead of being forced into a straight line.
The outer jacket is stiff enough for mechanical protection but not so rigid that it fights the cable's existing bend. That matters in splice trays where every millimeter of slack gets used. You can fold the sleeve into a tight loop without seeing that telltale bright spot on an OTDR trace. It's a small change in material choice, but it keeps the splice from becoming the weakest part of the span.
Software tools that turn PM splice checks into a quick pass/fail
Old-school PM splice checks meant squinting at OTDR traces and hoping the guy on the other end wrote down the right values. A decent software tool strips that guesswork out. It grabs the trace, compares loss and reflectance against the job spec, and gives you a green check or a red flag right on the tablet. No interpretation, no back-and-forth.
The best ones also log every pass/fail with the splice location and the fiber ID. If a rework ticket comes in, you can pull up exactly what the tool saw instead of relying on someone's memory from a 2 a.m. maintenance window. That turns a once-fussy verification step into something close to a barcode scan.
Where precision splicing stops being worth the extra cost
There’s a point in every project where chasing a flawless splice becomes a budget line item rather than a performance gain. If the joined material won’t face load, weather, or repeated stress, the extra passes and tooling time often add nothing but expense. A backing strip or a simple overlap can hold just as well for a jig, a prototype, or a one-off display piece.
The same logic applies when the splice sits in an area that gets machined, painted, or buried inside an assembly. Spending hours dialing in alignment to within a few thousandths makes little sense if the next operation removes that reference edge or hides the joint entirely. In those cases, a faster, slightly rougher splice is the rational choice.
It also stops paying off when material variation already exceeds the precision you’re trying to achieve. Trying to hit ±0.05 mm on stock that swings ±0.2 mm means you’re paying for a tolerance that doesn’t exist in the part. Better to match the splice method to the actual tolerance stack and move on.
FAQ
Standard splicers align the cores fine, but they don't rotate the fiber to match the stress rods or elliptical cladding. If those end up misaligned, you lose polarization extinction and the splice becomes unpredictable under temperature changes. A PM splicer adds rotational alignment and side imaging so the birefringent axes line up.
The Fujikura FSM-100P and FSM-100P+ are the ones most labs reach for, especially with the PAS alignment that images the stress members. The Fitel S184PM-SL also shows up a lot in production settings, and Thorlabs Vytran systems are worth a look if you need large-diameter or specialized fiber handling. Each has its quirks, but they all handle PM fiber far better than a general-purpose splicer.
It's not just the core. Good PM splicers capture side views from multiple angles and often use profile alignment to see the stress-applying parts, like boron-doped rods or panda eyes. Some machines also do end-view alignment, which directly images the fiber face and lets you rotate one fiber until the stress members mirror each other. That second approach tends to give higher polarization extinction ratios, but it's slower.
Splice loss alone doesn't tell you much. You need to check polarization extinction ratio, usually with a polarized source and a polarizer/analyzer, or a dedicated PER meter. A top-tier machine should keep PER above 30 dB across a well-prepared splice. If you only measure insertion loss, you might get 0.02 dB and still ruin a fiber gyro because the axes are 10 degrees off.
They're not plug-and-play, but most modern ones hide a lot of complexity behind automated routines. You pick the fiber type, load the program, and the machine walks you through stripping, cleaning, and loading. The harder part is keeping fibers dust-free and understanding how ambient temperature or poor cleaves affect alignment. Expect a day of practice to get consistent results.
For standard PM fibers like panda or bow-tie, you should see average splice loss under 0.05 dB, with many splices landing at 0.02 dB or below. PER typically stays above 30 dB if the fibers are clean and the program matches the fiber. Specialty fibers, like elliptical-clad or photonic crystal PM fiber, will have higher loss and more variation, so run a few test splices first.
If you're doing volume PM assembly, yes. A standard active splicer may align the core perfectly but leave the slow axis rotated, which shows up later as temperature instability or poor PER. A PM-specific machine removes that variable and usually includes stress-member imaging and rotation control. If PM work is occasional, a manual rotation jig plus your existing splicer can work, but it's slow and hard to repeat.
Conclusion
Polarization-maintaining fiber turns a tiny core misalignment into a measurable loss of extinction ratio, so any splicer chosen for this work has to nail the rotational orientation of the stress rods and keep lateral offsets well under a micron. Reviews that push only insertion loss figures miss the point: you need to check the polarization crosstalk or extinction ratio after splicing, ideally with a short length of fiber on each side, because heat and mechanical drift during the splice can undo an otherwise clean alignment. A bench unit earns its bench space here. It holds the fiber in stable, high-magnification imaging and can rotate one fiber against the other for fine PER peaking, something a handheld splicer often approximates but rarely matches.
Protection sleeves are another place where precision work quietly falls apart. A stiff or mismatched sleeve introduces microbends right at the splice point, and with PM fiber that stress leaks into polarization drift. The better machines pair with low-shrinkage sleeves that match the coating diameter, so the fiber stays straight after curing. On the software side, the most useful splicers don't just show a camera image—they estimate PER from the alignment profile and give a clear pass or fail before you heat-shrink anything. That saves a lot of second-guessing. Still, there's a cut-off where chasing the last few tenths of a dB in extinction ratio stops making sense. For short patch cords, low-coherence sources, or lab setups that can tolerate a little crosstalk, a mid-range active alignment splicer will often do the job without the price tag of a full bench system.
Contact Us
Contact Person: Mr XU
Email: [email protected]
Tel/WhatsApp: 86-25-85582828
Website: https://www.dvp.cn/en/