

Abrasive Paper: What It Is and How to Choose the Right Grit for Any Project
2026-09-13
If you've ever grabbed a sheet of sandpaper only to watch it clog in seconds or leave deep scratches on a cherished piece of wood, you already know that not all abrasives are created equal. Abrasive paper is deceptively simple—a backing coated with grit—but choosing the wrong one can turn a smooth finish into a frustrating redo. Whether you're prepping metal for paint, leveling a patch of drywall, or restoring a vintage table, the secret lies in understanding how grit size, backing material, and abrasive type work together. At SHENZHEN SUN ABRASIVES, we've spent years helping makers, woodworkers, and DIY enthusiasts match the right paper to the job—so you can stop guessing and start sanding with confidence. In this guide, we'll break down exactly what abrasive paper is, how grit numbers translate to real-world results, and the simple rules for picking the perfect sheet for any project.
What Abrasive Paper Actually Does to a Surface
Abrasive paper isn't merely a rough surface that grinds things down—it's a tool that reshapes the microscopic landscape of whatever it touches. When you move it across wood, metal, or paint, the embedded grit acts like thousands of tiny cutting edges, each one peeling away a minute curl of material. This isn't a random scraping; it's a controlled fracture process that depends on grit size, pressure, and the angle of your stroke. The result is a surface that transitions from whatever it was before into a uniformly scratched field, ready to accept whatever comes next—paint, glue, or simply a smoother feel under your fingertips.
The real magic happens at the boundary where the abrasive meets the substrate. Harder materials like carbide or ceramic grit tend to fracture and expose fresh cutting edges as they wear, which keeps the paper effective longer. Softer abrasives, such as garnet, dull more quickly but produce a finer, more consistent scratch pattern. Every pass of the paper doesn't just remove material; it creates a new texture defined by the depth and spacing of those scratches. That's why moving from coarse to fine grit isn't just about making things smaller—it's about replacing deep, irregular gouges with increasingly shallow, parallel furrows until the surface reflects light in a predictable way.
There's also a subtle chemical and physical interaction that often goes unnoticed. Friction generates heat, which can soften certain finishes or resins, allowing the abrasive to glide rather than cut. On wood, the paper can tear fibers or burnish them flat depending on grit and direction. On metal, it can embed tiny abrasive particles into the surface, which later cause premature wear if not cleaned. Understanding these secondary effects turns abrasive paper from a simple scratch-maker into a precision instrument—one that doesn't just remove stock, but actively engineers the surface condition you need for the next stage of your work.
Making Sense of Grit Numbers Without a Chart
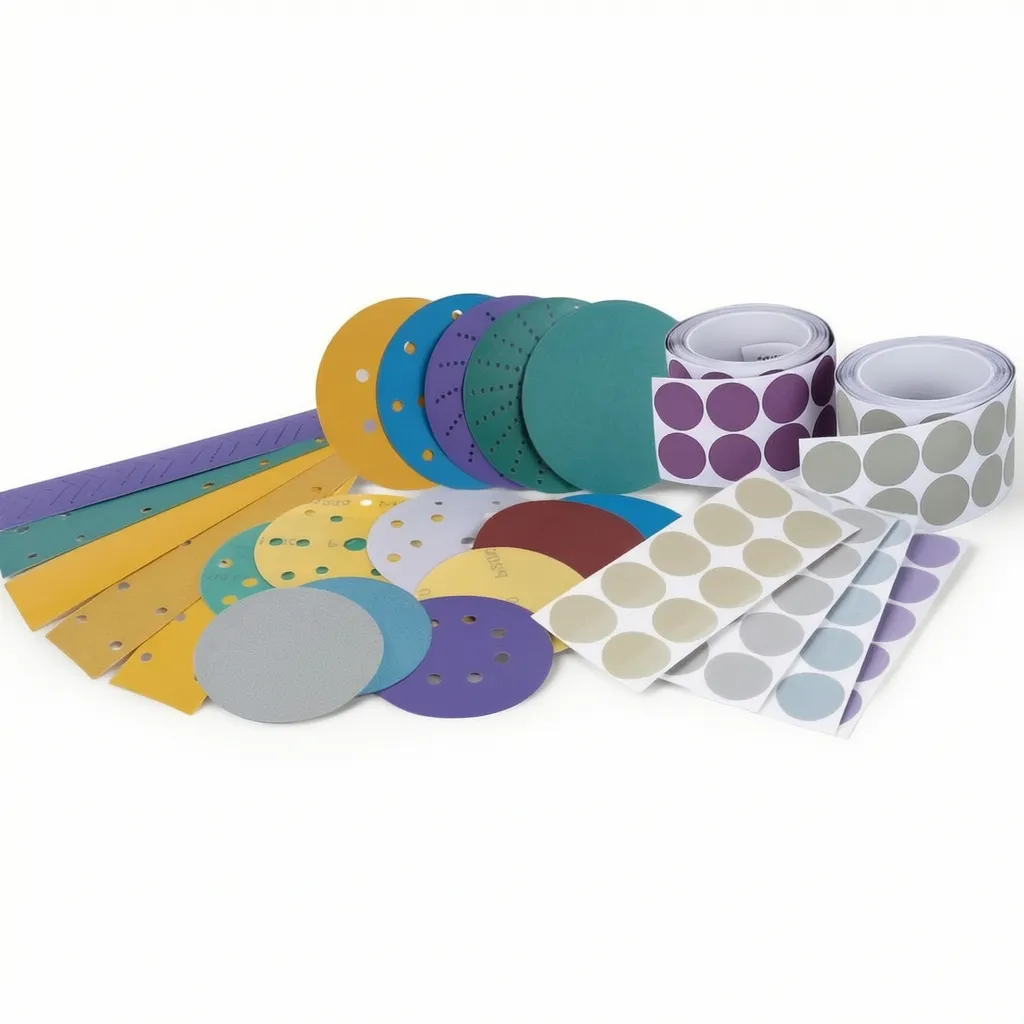
Most people assume grit numbers follow a simple linear scale, but they don't need to. You can anchor yourself with a few familiar benchmarks. A 60-grit belt tears off material fast, leaving deep scratches; an 80-grit disc still rough but manageable for heavy shaping. By the time you hit 120 or 150, you're moving from stock removal into surface smoothing. Once you pass 220, the work shifts toward refining and polishing. The numbers are based on the mesh screen used to sort the abrasive particles—more openings per inch means smaller grains, hence a higher number.
Another way to keep the scale straight without looking anything up is to remember the "double or halve" feel. Dropping from 220 to 120 feels roughly like doubling the scratch depth; jumping from 80 to 40 is a much bigger leap in how aggressively it cuts. So if you only remember a handful of reference points—40 for rapid material removal, 80 for heavy sanding, 120 for general prep, 180 for finish sanding, and 320 for between-coat work—you can fill in the gaps by feel.
The real trick is to stop trying to memorize a chart and instead tie each number to a physical outcome. Rubbing your thumb across a fresh 60-grit surface feels like coarse concrete, while 400-grit feels almost like paper. If the scratch pattern from your last grit still shows, you either skipped too many steps or didn't spend enough time. That hands-on calibration will teach you more than any table.
Matching Grit to Wood, Metal, and Painted Surfaces
Matching grit to the surface isn't just a technical decision—it's the difference between a finish that holds and one that fails quietly over time. For bare wood, start with a coarse grit like 60 or 80 to level uneven grain and remove old finish, then jump to 120 or 150 to refine scratches before sealing. The density of the species matters too: soft pine clogs paper faster than hard maple, so you may need to swap sheets more often rather than pushing harder.
Metal behaves differently under abrasion. Soft aluminum and brass load up fine grits almost immediately, so go with 80 or 100 first, then use a lubricant like mineral spirits with 220 or higher to keep the paper cutting clean. For hardened steel or cast iron, 120 is often the starting point, but watch for glazing—if the surface turns shiny and the paper skates instead of bites, you've moved too fine too soon.
Painted surfaces are the trickiest because you're never sure what's underneath. If the paint is old and brittle, a medium grit like 120 will knock down loose chips without digging into the substrate. For fresh, well-cured paint, stay at 220 or above—anything coarser will leave visible scratches that show through the next coat. When in doubt, test a hidden corner first and let the surface tell you when to step up or down.
Why Backing Weight and Flexibility Matter More Than You Think
A heavier backing does more than make a product feel substantial in your hand. It anchors the material to the subfloor, reducing micro-movements that gradually separate seams and create uneven wear patterns. Over time, that extra mass also works against edge curl, the telltale sign that a floor is fighting its environment rather than settling into it. When the backing can hold its own shape, the visible surface stays flat and predictable.
Flexibility gets overlooked because people confuse it with softness. The real requirement is controlled give: enough pliability to absorb subfloor irregularities without cracking, but enough rigidity to prevent the plank from bending out of plane under furniture loads. A backing that flexes the right way spreads pressure across the entire profile instead of concentrating it at the joints, which is where most failures begin.
Together, backing weight and flex define how a floor behaves after installation, not just during it. A product that feels fine in the showroom can turn brittle or wavy in a real room if the backing was treated as an afterthought. Paying attention to these two characteristics before you buy saves you from chasing uplifted corners, hollow spots, and seam separation later.
The Hidden Trade-Offs Between Cut Speed and Finish Quality
Most machinists learn early that cranking up the feed rate saves time, but the surface tells a different story. A faster cut leaves behind a rougher finish because the tool has less time to shear material cleanly. Those tiny ridges and tears aren't just cosmetic—they can act as stress risers, shortening part life in demanding applications.
The real art lies in recognizing when a compromise is worth it. Roughing passes can push speed aggressively since a secondary finishing pass will clean up the mess. But trying to combine both into a single aggressive cut rarely works well. You end up with a surface that looks acceptable under shop lighting yet fails precise measurement or wears prematurely in service.
Tool geometry shifts the balance more than many realize. A larger nose radius or a wiper insert can smooth out the peaks left by fast feeds, letting you run quicker without sacrificing finish. Yet these solutions bring their own burdens—higher cutting forces, more heat, and sometimes chatter. The hidden trade-off is never just speed versus quality; it's speed versus quality versus tool life versus setup rigidity.
A No-Nonsense Starting Point for Common DIY Tasks
Most DIY failures happen before the first cut. You grab a random tutorial, skip the prep, then wonder why the shelf tilts. Start with a clear list: what are you fixing, what tools do you actually own, and how much time can you spare? Write it down. A $5 notebook beats a dozen open browser tabs.
Then strip the project down to three steps: measure, cut, fasten. If a tutorial asks for twelve specialty bits or a laser level you'll use once, walk away. Borrow, rent, or adapt. Dry-fit everything before glue or screws. The goal is a working result, not a museum piece.
Finally, accept that the first attempt will have flaws. Sand down the rough edge, shim the wobble, and move on. You'll learn more from one slightly crooked shelf than from ten hours of watching perfect builds.
FAQ
Abrasive paper is a flexible backing material coated with abrasive grains—often aluminum oxide, silicon carbide, or garnet. While sandpaper is the common term, abrasive paper encompasses a wider range of backings and minerals, including waterproof versions for wet sanding. The key difference is that not all abrasive paper uses sand; many use synthetic or natural minerals bonded to paper or cloth.
There are two main standards: CAMI (used mainly in North America) and FEPA (used in Europe). A P800 in the FEPA system is roughly equivalent to 400 grit in CAMI, though both describe fine abrasives. When shopping, check if the package mentions P-grade or plain numbers, and match to your project’s needs rather than assuming the same number always behaves identically.
Think in terms of material removal versus surface refinement. Coarse grits (40–80) shape and remove stock quickly; medium grits (100–150) smooth out those scratches; fine grits (180–220) prepare for finish; very fine (240 and above) refine between coats. Start with the coarsest grit that will remove the defect but not gouge the surface, then work through successive grits without skipping more than one step.
It’s possible but not ideal. Wood clogs paper quickly, especially with soft resins, so open-coat aluminum oxide works well. Metal generates heat and needs a harder, sharper mineral like zirconia or ceramic. If you switch from metal to wood with the same sheet, embedded metal particles can stain the wood or score it. Keep separate stocks for each material.
That paper has a waterproof backing and a resin bond that won't dissolve in water. Wet sanding reduces dust, keeps the abrasive from loading, and produces a finer finish on paints, clears, and metal. Use it with a few drops of water or a light lubricant; the slurry helps carry away debris. Dry-only paper will fall apart quickly if soaked.
Run your fingertip lightly over the surface. If the grains feel flattened or the paper glides without cutting, it’s spent. You might also see shiny spots where the mineral has worn away or clogged with paint/wood dust. A quick trick: rub the paper against a clean rubber sole or use a cleaning stick to unclog it; if performance doesn’t return, switch to a fresh sheet.
Yes, but it depends on the finish. For most varnishes, lacquers, and polyurethanes, very fine grits like 320–400 are used dry or lightly damp to knock down dust nibs and level the surface without cutting through. Always let the finish cure fully first. Wipe away the residue with a tack cloth before the next coat, and avoid using coarse paper—it will leave visible scratches under the new coat.
Skipping grits to save time. Jumping from 80 to 220 leaves deep scratches that only show up after staining or painting. Another common error is starting too fine, which takes forever and burnishes the surface, preventing finish absorption. A better approach: remove material with coarse grit, then spend twice as long on each finer grit as you think you need. The surface should look uniformly hazy before moving up.
Conclusion
Abrasive paper works by carving tiny grooves into whatever you drag it across, and the depth of those grooves determines everything from how quickly you remove material to how the final surface feels. The grit number is simply a measure of the abrasive particles packed onto the backing—lower numbers mean fewer, larger particles that tear through stock fast, while higher numbers cram in more small particles that shave off fine layers. You do not need a chart once you learn the logic: for stripping paint from wood or knocking down a rough weld, 40- to 80-grit does the heavy lifting but leaves visible scratches. From 120 to 220 grit is the everyday range for smoothing bare wood before finishing, and anything 320 or above is only for scuffing between coats or final polishing where you want to remove almost no material at all.
Beyond grit, the backing has an outsized influence on how the paper behaves. Thin, flexible paper follows curved profiles and folds into tight spots but can tear under wet sanding or hard pressure, while cloth or film backings cost more and stand up to repeated flexing on metal and automotive work. There is also a built-in trade-off between cut speed and finish quality: a coarse belt can strip old varnish in seconds, but the deep scratches it leaves force you through at least two more grit steps to erase them. For common DIY tasks, start one step coarser than you think you need, move to the next grit only after the previous scratches vanish, and stop around 180 or 220 for most paint-ready surfaces—finer grits add time without any real gain in adhesion or durability.
Contact Us
Contact Person: Amanda Wang
Email: [email protected]
Tel/WhatsApp: +86-13602569854
Website: https://www.sunabrasives.com.cn